
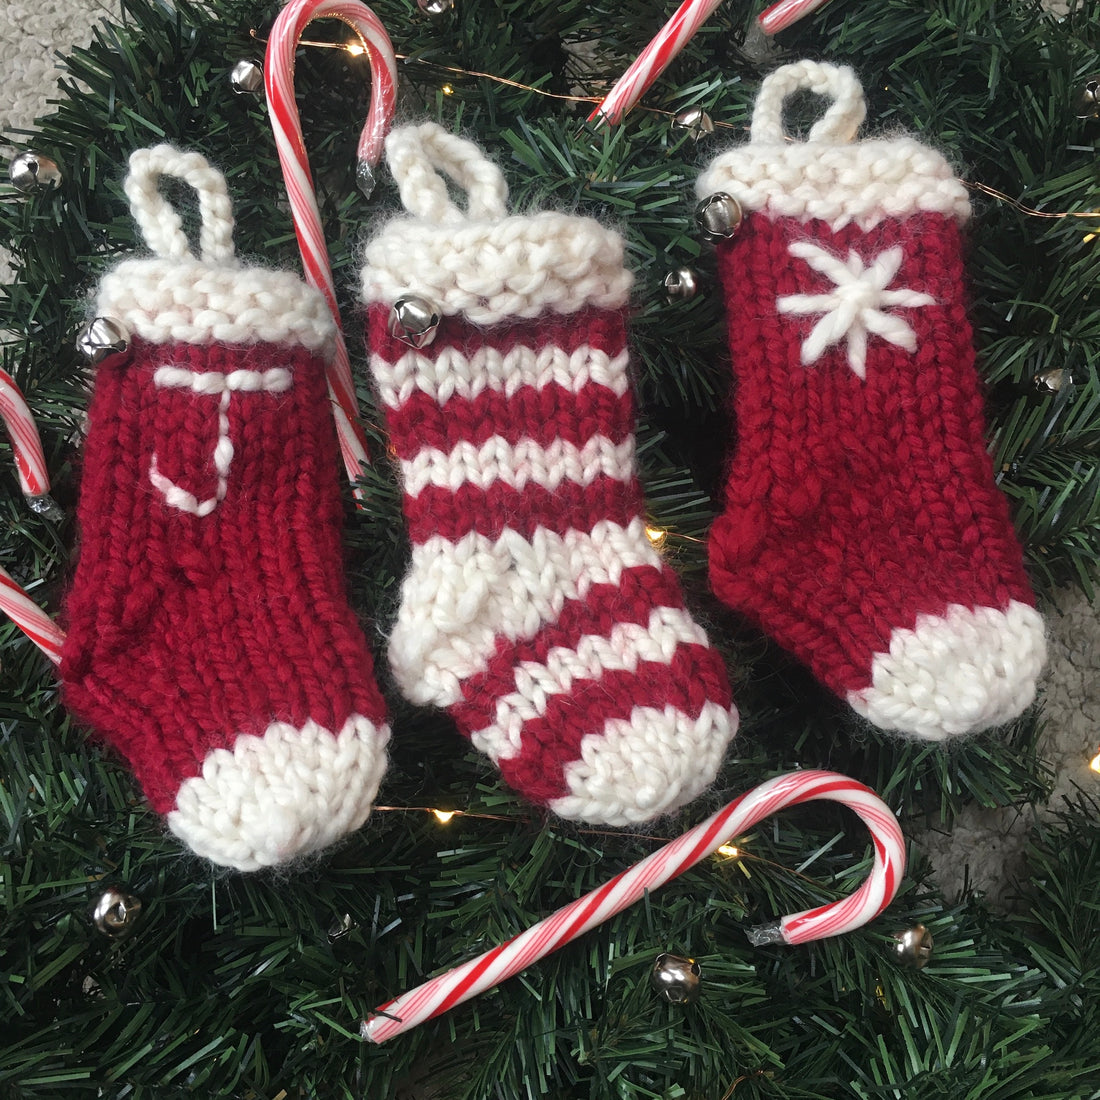
This cute little stocking is the perfect quick gift for everyone on your list! It knits up very quickly, I made mine in about an hour each. It's the perfect size for a mini bottle of liquor, some candies, or a tube of lipstick or nail polish. It's easy to customize, with instructions for stripes, or for embroidering either a star/snowflake or your loved one's initial. These quick and easy stockings are a great way to show you care and still have enough time to knit for everyone on your list. Hang them on the tree, on a garland, or even over a mini fireplace and wait for St Nick to fill them with goodies!
About the Pattern
Yarn
Lion Brand Wool-Ease Thick & Quick (20% wool, 80% acrylic; 106 yards / 170 grams). MC: Cranberry. CC: Fisherman. Or other super bulky (5-6 wpi) yarn. Only a small amount of each color is needed, less than 10 yards each.
Needles
US 11 (8mm) DPNs or circular needles for magic loop, or size to obtain gauge
Notions
Yarn needle
Stitch marker
Jingle bell for embellishment
Gauge
12 sts and 16 rows = 4” Stockinette stitch in the round
Finished Measurements
3” wide x 5.5” high
Pattern Notes
This pattern is worked just like a toe-up sock with a short-row heel, except miniature. The cast on is Judy’s magic cast on, and the heel is based on the Fleegle heel technique. It is worked toe-up in the round. A tutorial for Judy’s magic cast on can be found here: http://knitty.com/ISSUEspring06/FEATmagiccaston.html
Abbreviations
- BO: Bind off.
- CC: Contrasting color.
- CO: Cast on.
- K: Knit.
- K2tog: Knit two stitches together.
- MC: Main color.
- M1R: Make one right. Lift the bar between stitches from the back onto the left needle and knit through the back loop.
- M1L: Make one left. Lift the bar between stitches from the front onto the left needle and knit through the front loop.
- P2tog: Purl two stitches together.
- Sl: Slip stitch.
Continue scrolling for the free pattern!

Pattern Instructions
The instructions are split into striped and plain (with contrast toe and cuff) instructions. The instructions for the toe and the cuff are the same for both. The instructions for the foot, heel, and leg differ depending on which style you are making.
Toe (Both)
Using CC and Judy’s Magic Cast On, CO 6 sts total (3 on each needle).
Rnd 1: Knit.
Rnd 2: *K1, m1R, k1, m1L, k1* repeat from * to *. (10 sts)
Rnd 3: Knit.
Rnd 4: *K1, m1R, k3, m1L, k1* repeat from * to *. (14 sts)
Rnd 5: Knit.
Foot (Striped)
Knit 2 rounds in MC.
Knit 2 rounds in CC.
Repeat these 4 rounds twice, then knit 2 more rounds in MC for a total of 10 rounds.
Foot (Plain)
Knit 10 rounds in MC.
Heel (Both)
Separate stitches onto two needles (7 sts each) if they are not already arranged that way. I find it easiest to either use a 29” or 36” circ needle for magic loop, or to use 2 16” circs. The instructions are separated into 1st and 2nd needle for ease of understanding. Note that the first 3 rounds are worked in CC for the striped stocking, and the entire heel is worked in MC for the plain stocking.
Rnd 1 (CC for striped, MC for plain):
1st needle: Knit across.
2nd needle: K1, m1R, k5, m1L, k1. (9 sts on this needle)
Rnd 2 (CC for striped, MC for plain):
1st needle: Knit across.
2nd needle: K1, m1R, k7, m1L, k1. (11 sts on this needle)
Rnd 3 (CC for striped, MC for plain):
1st needle: Knit across.
2nd needle: K6, turn.
Sl1, p1, turn.
Sl1, k2tog, k1, turn. (10 sts on this needle)
Sl1, p1, p2tog, p1, turn. (9 sts on this needle)
Sl1, k2, k2tog, k1, turn. (8 sts on this needle)
Sl1, p3, p2tog, p1, turn. (7 sts on this needle)
Sl1, knit across.
Rnd 4 (MC for striped and plain): Knit across both needles.
You can now rearrange the stitches however you like to work in the round.
Leg (Striped)
Knit 2 rounds in MC.
Knit 2 rounds in CC.
Repeat these 4 rounds twice, then knit 2 more rounds in MC for a total of 10 rounds.
Leg (Plain)
Knit 10 rounds in MC.
Cuff (Both)
Switch to CC.
Rnd 1: Knit.
Rnd 2: Purl.
Repeat these 2 rounds once more for a total of 4 rounds.
BO loosely. Do not cut yarn. Chain 15 sts. Cut yarn, draw through loop of final chain, and sew chain into a loop to hang the stocking.
Finishing
Weave in ends and block if desired. Sew jingle bell to left front of stocking just below the cuff. For the star/snowflake embroidery, follow the chart below. For an embroidered initial, use backstitch to create the letter, with each embroidered stitch being the same length or height of the knit stitch you are embroidering over.
Snowflake Embroidery Chart
Each V in these charts is a knit stitch. Center the chart at the center of what will be the front of your stocking. Each red line is an embroidered stitch. The lines that appear in between Vs go in between knit stitches, and the lines that appear to start and stop halfway through a V go into the knit stitch itself.
The snowflake is made of four long stitches, which should be done in this order: 1) vertical, 2) horizontal, 3) and 4) diagonal. Then a small stitch is place over the intersection of all the stitches to hold them in place.

Share your finished projects on Instagram by tagging @juliettepecautdesigns and using #MiniStockingOrnament and #JPDChristmas
1 comment
These mini stockings are perfect for small gifts; love the quick knit pattern! Jjaemu game